

DIY - CUTE KAWAII CANDY KEYCHAINS
My daughter's 9th birthday is coming up and boy do we both love a craft party! But are 9 year olds into toilet paper and pipe cleaner crafts still? I decided to raise my party crafting game with something a little more hi brow for her and her friends and these Cute Kawaii Candy Keychains do just the trick! A cute craft AND take home favor all in one!
Materials

* PVC plastic sheet (I purchased this tablecover from Amazon) cut into 5" x 4.5" pieces
* Kawaii Acrylic and Polymer Clay faux candies from Happy Kawaii Supplies Etsy shop
* Keychain holders from Happy Kawaii Supplies or VeryCraftEtsy
* Jump Rings from VeryCraftEtsy
* Decorative Washi Tape from your local craft store
* Colorful grommet kit from Amazon (optional)
* Paper (to protect your Hair Straightener)
Tools:
* Glue Tape
* Scissors
* Needlenose Pliers
* Pinking Shears (optional)
* Hair Straightener
* Hammer (only used for grommet kit)
* Hole Punch
Instructions

Along the short side of one end of the PVC sheet, run a line of glue tape.

Starting with the unglued side of the PVC sheet, fold towards the middle. Do the same with the glue taped side and press together to seal.

Taking your piece of paper, fold over one open end of the PVC sheet to sandwich the PVC between the paper. This is to protect your hair straightener from getting plastic melted on it.

Clamp the hair straightener to seal the open plastic end together. I recommend sealing only 1cm of the end but this is up to you! Make sure the paper is covering all parts of the PVC plastic so you don't ruin your straightener. I used the lowest heat setting, but it's worth it to do some tests to figure out which heat setting will melt the plastic.

Fill your package with candy! It is best to not overfill - I suggest doing a single layer so that each candy is visible. You'll also want to make sure you can seal the bag shut!

Now seal the other end of the package using the paper and hair straightener to seal your candy bag shut!

With your decorative washi tape, cover the sealed ends of the candy bag and wrap the washi tape around to the other side.

Your candy package should look like this now!

Using your pinking shears, trim a decorative edge along the tops of the washi tape. Pinking shears are optional - you can always just cut your own decorative end by doing a zig zag cut, or just trim with straight scissors to make a clean edge.
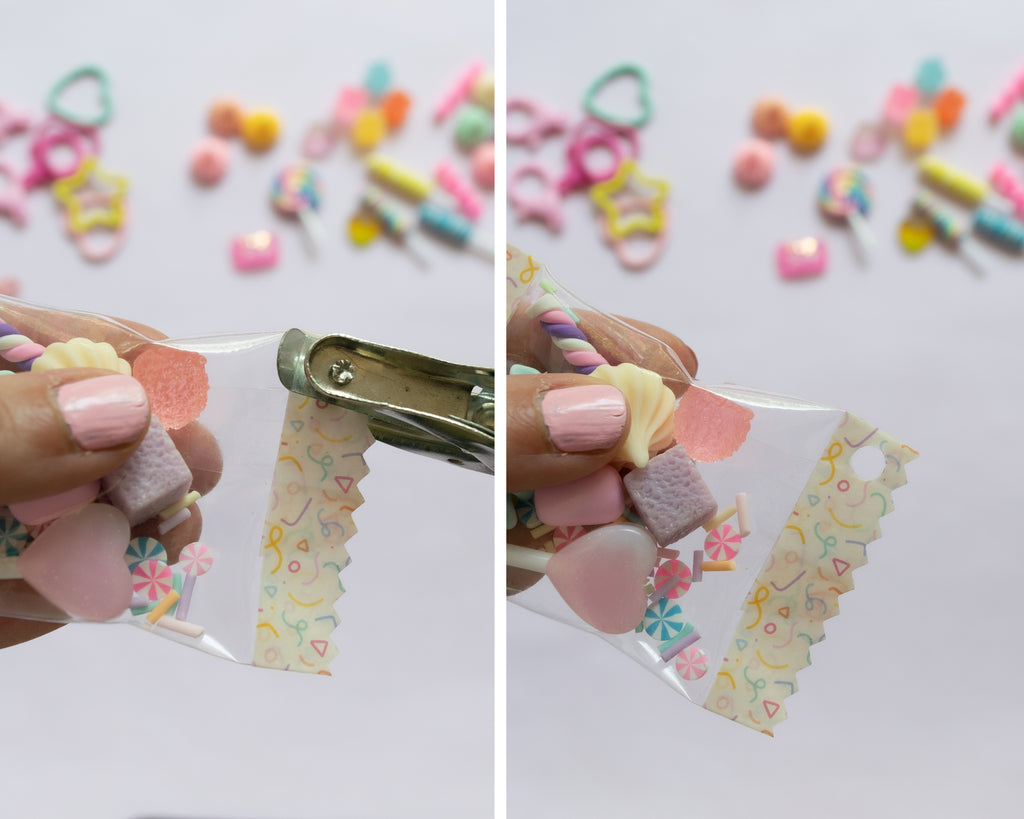
Using your hole punch, punch a hole at one corner of the candy bag.

*Optional Step* Install the grommet using your grommet set an hammer.
You can skip the step. Grommets just give the hole a "finished" look but you can otherwise just move forward with a hole punched hole.

Using your needlenose pliers, add the plastic keychain holder and attach onto the hole of the candy package. Here, we've added some cute dangly things like beads and tassels. This is of course optional. Linking the tassels and beads.

Voila! You can now attach your Cute Kawaii Keychain to your backpack or handbag!

* * * * *
